Pages

Search This Blog

Sunday, March 27, 2011

12 Block Series: Block 4 - Solid Bauble Block

Unlike the 'bumps' created by some of the other stitches in the other blocks in the series, these baubles are solid, as in ball-like.  That's what'll happen when you put four half-double crochet stitches together!  Increase the pattern width by multiples of four, and you will have a really cute baby afghan!  As is, and in cotton, the block makes for a great washcloth, whether for dishes or you skin!

Note:  Though this block can be a little more difficult to do than the three prior ones, it is still a very doable block for beginners.  If you are a beginner just learning, I would recommend doing a practice block by using a larger hook, such as a size H.  Your final block will be bigger, but trying to get four stitches into one hole can be tough, and a little bit of practice never hurt anyone.  The larger hook size is also recommended for anyone looking for a larger block.  My test runs block sized out as follows, F-hook, 8" x 8" (a very tight block), G-hook, 8-3/4" x 8-3/4", and an H-hook, 9-1/2" x 9-1/2", all using worsted weight cotton yarn (your sizes may vary).


Solid Bauble Block
Note: Better Photo Coming!

Note:  Hook Size: G (see notes)

Stitches used:
Chain (ch)
Single Crochet (sc)
Half Double Crochet (dc) Actually only used in the cluster (CL)


Special Stitch: Hdc4tog Cluster (half double crochet 4 together  (CL): *YO, insert hook in stitch indicated, YO, pull through*, repeat from * to * three more times.  You should have 9 loops on your hook! YO, pull through all nine loops.  TIP:  Keep your YO's loose!

Multiples:  Even number of chain stitches

Instructions:

Ch 32

Row 1: Sc in second chain from hook and in each ch across. Ch 1, turn.  (31 st)

Row 2: Sc in of the first three sc, * CL, 3 sc in next four stitches*.  Repeat from * to * to end.  Ch 1, turn.

Row 3:  Sc in each st across to end. Ch 1, turn.

Repeat Rows 2 and 3 until desired length is reached, ending with a Row 3.  End off.

Solid Bauble Block
Close-Up
Shown with a Single Crochet Border


Sunday, March 20, 2011

Happy Spring Everyone!

I am so excited!  Spring is FINALLY here!  This past winter, Cape Cod has seen one snow storm after another and I didn't think this day would ever get here!!

I had to go off and clean a couple of cottages (my 'other' job) in preparation of the summer season, and took a moment here and there to just appreciate the day!  You know that spring has arrived when the crocus' start popping up!

Future Tulips

Crocus
Crocus

Crocus
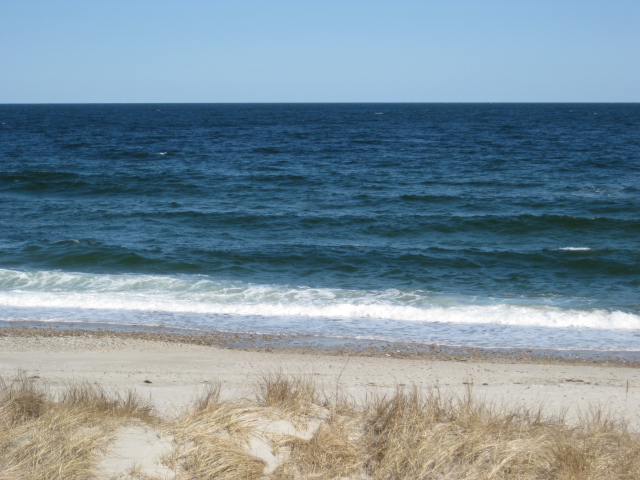
And because spring is followed by summer, here's a couple of shots of the Atlantic from East Sandwich Beach to get you excited!

Don't you just love these colors?!
Looking towards the Massachusetts Bay entrance of the Cape Cod Canal


I came up with a couple of fabulous ideas for projects to create while looking out across the Bay!  But first, I'm going to sit outside on the deck (no ocean view from my house, but that's okay), and work on a couple of the new blocks. 

Friday, March 18, 2011

Three Blocks Down!

Not to be confused with a band by a similar name!

Do you know it takes longer to write a pattern, take pics and load/post everything to the computer than it does to actually crochet the item?!  I've spent the better part of the day doing just this.  The good thing is that the first three blocks of my 12 Block Series are posted here and on Ravelry!  And I've been able to figure out some glitches.  There is still some cleaning up to be done, and a few computer technical issues to sort through, but I'm very happy with the end result.  I hope you are, too!

The next three blocks should be posted within the next week, though I am hoping it'll be a lot sooner.  Stay tuned.

Happy Hooking!
Sheila

12 Block Series: Block 3: FLO-BLO Block

FLO-BLO Block


Note:  Hook Size: H

Stitches used:
Chain (ch)
Single Crochet (sc)


Instructions:


Ch 32


Row 1: Sc in second ch from hook and in each ch across.  31 sc competed. Ch 1, turn.


Row 2: Sc in FLO of first sc, *Sc in BLO of next sc, sc in FLO of next sc* repeat from * to * . Ch 1, turn.


Row 3 - end.  Repeat Row 2 until length desired.  End off.

FLO-BLO Block, close-up detail. 


This pattern uses only the front loop or the back loop of the stitch below.  It creates a thinner finished item as the base of the stitch you are making is not going through both loops.  By alternating the loop used, there is no ridge created, which would be the case if you did all the stitches in only the front loop, or only the back loop along the row.

You will note that you will need to use a hook size larger than that of other blocks due to the nature of the stitch.  Using an H hook keeps the block size at 9" x 9", the same as the others in this series.  Your results may vary.

Thursday, March 17, 2011

12 Block Series: Block 2: SC2TOG (Single Crochet 2 Together)

Sc2tog Block

Stitches Used:
Ch: Chain
Sc: Single Crochet

Special Stitch Pattern: Single Crochet 2 Together Cluster (CL): Insert hook into stitch indicated, YO, pull through (2 loops on hook), insert hook into next stitch, YO pull through (3 loops on hook), YO, pull through all 3 loops on hook.

Pattern Multiples:  Chain an even number of stitches for pattern.  One chain required for turning, 2 chains for each Sc2tog, and one sc for last stitch of row.


Instructions:


Chain 32


Row 1: CL (see Special Stitch Pattern) in second and third chain from hook, ch 1. *CL, ch 1* in next two chains*  repeat from * to * for a total of 13 CL completed and  three chain stitches remain.  Sc2tog in next 2 chains (do not ch 1), sc in last chain.  Ch 1, turn.


Row 2:  CL in first two sc of previous row, ch 1. *CL in next 2 sc, ch1* repeat from * to * for a total of 13 CL completed and three sc remain on previous row.  CL in next 2 sc (do not ch 1), sc in last sc. Ch 1, turn.


Rows 3 - end:  Repeat Row 2 until you reach desired length.


Sc2tog Block, Close-up Detail


Wednesday, March 16, 2011

Granny Squares and Rugs: Recalling Memories of Old

It's funny how much we forget over the years, and how the littlest thing can bring a flood of memories to mind.

Back to the Beginning
Back in the dark ages of the '70's, there was a girl named Jeannette who sat in front of me in in sixth grade.  She would come to school pretty much everyday with a ball of yarn and a crochet hook. Her seat was in the front row, and the teacher sat in the back of the class, so Jeannette could keep her WIP on her lap and sneak in a few stitches here and there until she would get caught.  Her main item was a shoulder bag and she had one in every color under the sun, using a different one everyday, and making more along the way.  She also crocheted granny square vests and the occasional baby blanket.  It was the bags that I coveted.

One day I brought in this scrap ball of yarn and my brand new crochet hook and asked her if she would teach me.  She took one look at the yarn and said it was unworkable and to buy a new skein and she would give me a lesson.  This was on a Monday.  I bought the hook with my allowance on Saturday and couldn't wait to get to school.  Now it would be a whole week until I could get back to her with the yarn.  I was feeling disappointed already.  That Saturday, I went back to the store to look for the yarn.

For those of you that remember back then, the yarn choices were slim at best.  Red Heart worsted, baby, rug and Knit-Cro-Sheen were about all you got at Woolworth's. And Woolworth's was the only store I had access to that carried yarn.  I had no idea what was what, so I bought the cheapest I could find, which happened to be rug yarn, a thick, coarse yarn used to make rugs.  She informed me I got the wrong yarn and made much fuss over this issue.  She was 12 and all ready high maintenance!!  But she would show me anyways.  But, not the bag which I was coveting.  Instead she showed me how to make a granny square.  As it was the end of the school year, and she lived too far away to visit, I had the entire summer to practice the chain, slip stitch and double crochet of the granny square.  The following September I barely saw her, so my lessons had come to a sad end.

It would be granny squares or nothing.  So it was granny squares.  Big ones and small ones, single colored  and multi-colored, one block and multi-blocked, I made granny squares until I couldn't make them any more.  It's like eating a food so often and for so long, that even though you loved it, you were just sick or it.  I hated granny squares.  The crocheting stopped, but the desire to do it did not.

Fast Forward a Few Years
I start crocheting again and while I'm sitting on a bus going from Somerville to Boston a lovely woman sitting next to me asked what I was making when I pulled out the yarn and hook.  I explained that I wanted a small rug and the granny square was the only thing I knew how to do. She asked if she could show me a better stitch to do a rug with, and I handed her my hook and yarn with a "Thank You"!  My second lesson began!

It was a perfect stitch for rugs. Where the granny square was thin and holey, the stitch she taught me was thick and dense.  I don't think she told me a name of the stitch, and I would go on to call it the 'Rug Stitch'.   I would only make a couple of rugs before I would again put crocheting into the back of the closet.  I would forget how to do the stitch, but the sub-conscience has a way of remembering.  For example, I remembered the name Rug Stitch, and I would find myself trying to recall a technique without realizing that I was attempting to do the Rug Stitch.

Teaching Myself (sort of)
One Christmas in the early/mid '80's I decided to make some crocheted gifts and while perusing the yarns and pattern books (I didn't know how to read them)  I came across a Leisure Arts leaflet for Fisherman Afghans.
Leisure Arts Leaflet #250 - Out of Print
The afghan on the right is the one I made and is called Armagh.

There was this one pattern I just loved, so I grabbed the book and was determined to learn to make it. The stitches were gorgeous and though it took me a great deal of time, I finally finished it.  (It came out a lot smaller than the instructions said it would be. I had always been told that I crocheted tight, but it wasn't until this afghan that I learned what they were talking about!)  I loved this afghan!  An ex-boyfriend asked to keep it when we broke up.

Current Day
That little thing to bring all of this back to me happened last night while looking over patterns at ravelry.com (use the link in the right-hand column), and came across this one for a potholder: http://www.ravelry.com/patterns/library/siberian-stitch-potholder.  No, I wasn't looking for a potholder pattern, but the stitch looked like it may be a type of afghan (currently being called Tunisian) stitch, but I couldn't recall ever doing a stitch called Siberian. So I went to the pattern and watched the tutorial: http://siberianstitch.com/tutorial.html.

It wasn't an afghan stitch, but was in fact the Rug Stitch I had learned so many years ago!

I want to thank Mark Meier for bringing this memory back to me, and for sharing the stitch with everyone! Though I'll always call it the Rug Stitch, I understand his name for it - it is perfect for creating cold weather wear!  And I love his use of it for potholders! Brilliant idea!

And I want to thank the total stranger who took a moment to show a teenager on a bus something new. And to Jeannette for the first step.

I'm sure that I'll create something new to bring to everyone here using the Rug Stitch. I can see it being used for pet beds, yoga mats and pillows.  Maybe even a winter skirt using a lighter weight yarn. But don't expect me to design anything with granny squares - they are still off the menu!

Happy Hooking!
Sheila

Friday, March 11, 2011

12 Block Series: Block 1: Cross-stitch Block

The square was made with Lily's Sugar'n Cream, a 100% cotton, medium worsted weight yarn, and is shown with the optional Finishing Edge.

The instructions for this square will allow for any yarn of any weight to be used, though the final size will be effected.  Please read through the instructions (they're short) and the notes following for more information and ideas.

Finished size: Approximately 9" x 9" (Using a medium worsted weight (#4) yarn and size G (4.25mm) hook.)
Gauge:  4 stitches (2 cross stitches) = 1", 6 rows (3 each of alternating sc and cross stitch rows) = 2".  Always test your gauge by making a swatch.

Stitches used:
chain (ch)
slip stitch (sl st)
single crochet (sc)
double crochet (dc )
cross-stitch (cs)
skip (sk)

Special Stitch Instructions:  Cross-stitch pattern (cs):  sk next stitch, dc in next stitch, then dc in sk stitch.
Pattern is worked over an even number of stitches, two for each cross-stitch, plus the turning chain.
Turning chain does not count as a stitch in this pattern.

Ch 31
Row 1:  Sc in the back bar of the second chain from hook and in each of next 29 chains. (30 sc). Ch 3, turn.
Row 2:  Dc in each of first two sc, cs (see Special Stitch Instructions above) over next 26 stitches (13 cs made), dc in each of last two chains. Chain 1, turn
Row 3: Sc in each stitch across (30 sc). Ch 3, turn.
Repeat Rows 2 and 3 for pattern until at length desired, ending with Row 3, do not ch 3. If making into a dishcloth,, do not end off, do not turn and follow instructions for Optional Finishing Edge, or add one of your own.  Otherwise end off and work in ends.

Optional Finishing Edge: Work sl st evenly down the side of the piece, ch1 at the corner.  Sl st in each stitch across the bottom, ch 1 at corner.  Sl st evenly up the opposite side, ch1 at corner, and sl st across the top of your work ending with a sl st to join at beginning. Work in ends.

Close-up detail of the stitches crossing over each other, creating a cross-stitch.

For dishcloths or facecloths, it is recommended that you use 100% cotton and work the Optional Finishing Edge to provide stability.

Stitch Multiples (or calculating the starting chain): Each cross-stitch requires two stitches to complete.  Chain an even number of stitches, and add the appropriate number of chain stitches for the turning chain.   For example, in this pattern, the chain is 31, 30 for the body of the work, and 1 for the turning chain for the first row single crochet.  If you wish to use the cross-stitch stitch without the single crochet rows, then the appropriate turning chain stitches (3) would need to be added to the 30 stitches of the body.

To increase the size of the block, you will need to add any multiple of even number of stitches.  Likewise, to decrease the size of the block, you will need to subtract any multiple of even number of stitches.

This pattern can be done in any yarn of any weight and with any size hook.  You can also increase or decrease the number of starting chains and total number of rows to create the individual sized square of your choice.

Play around with it, and have fun!